Glazing can be a great technique to bring more depth and vibrancy to certain areas of your painting. There are several different use cases for glazes, but in this post I'm going to focus on how to increase luminosity in areas like the skies or spots you wish to add contrast to.

Note: This blog contains affiliate links and purchasing through them supports our site at no extra cost to you.
What is glazing?
Glazing refers to a painting technique where a thin, transparent layer of paint is applied over a dry layer of paint. Artists often use glazes to enhance the luminosity, depth, atmosphere, and richness of colors in a painting. A glaze can be achieved by using translucent or transparent paints, typically oil or acrylic, and applying them in a diluted form. This technique allows light to pass through the glaze and reflect off the underlying layers, creating a luminous effect.
How to approach glazing in your paintings?
When approaching glazing in your paintings, you should always follow a few key steps. Firstly, ensure that the underlying layer of paint is completely dry before attempting to glaze. Next, dilute your paints appropriately for a thin, transparent consistency. Finally, carefully apply the glaze in thin, even layers, allowing each layer to dry before adding additional glazes. By following these steps, you can effectively achieve the luminous and atmospheric effects that glazing can bring to your artwork.
I always learn best by example, so here's a painting that I used glazes in that is a good demonstration of the process:
The upper portion of this painting has been drying for several weeks and so I'm ready to start glazing the sky. It's important that I do not glaze too early because I want to avoid any damage to the dried layer of paint. So a quick piece of advice is always give your painting thorough time before attempting to glaze.

I use Liquin Impasto and a good artist grade paint thinner. I'll need some small brushes to apply and some larger and more stiff brushes to fan it out and blend it.

I get some paint thinner on to my palette and start mixing my colors into the thinner to create a wash. It's important to mix this with fat over lean in mind. So I use a little more medium than what I did in the first layer of paint on the canvas.

I want the mixture to be just darker than what's already dried. So you can see how subtle it is when it starts going on.

I like to use these large bristle fan brushes to scrub vigorously side to side to spread out and even out the glaze. This creates a darker hue which provides more luminosity and more depth in your painting. Remember that when you glaze you are generally going to darken the area.
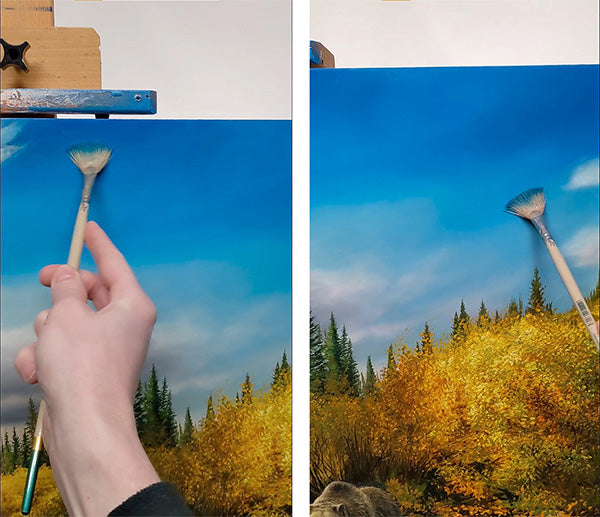
It's helpful to use paint colors that are more transparent than opaque, although opaque colors can make for an interesting effect. When using an opaque color, it can be semi-transparent which could lighten the area, but add a twist to it depending on the color used.

Overall it may be hard to see the difference on camera but it makes a big impact when viewing the painting in person.


